本文针对Mysql5.7版本,系统为centos
如需安装mysql8版本,请移步如下链接
Mysql下载
Mysql的下载地址如下
https://downloads.mysql.com/archives/community/
如下图
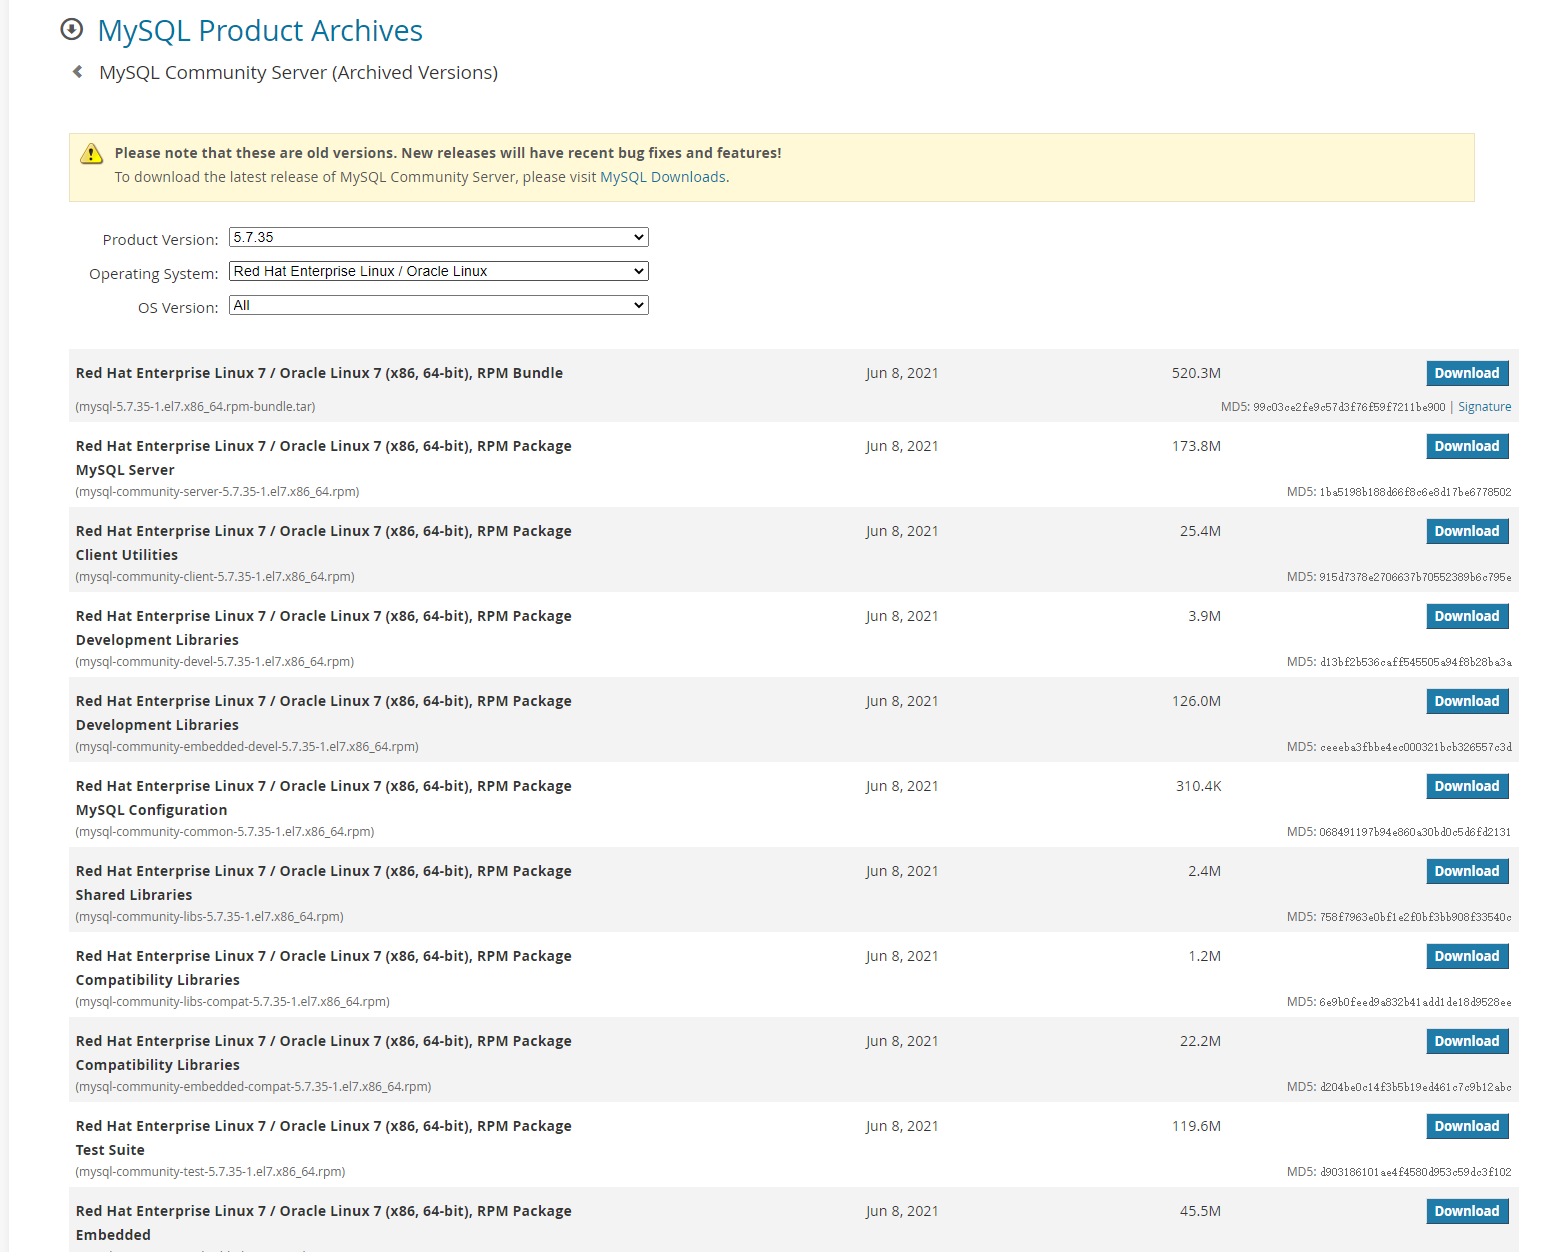
如何选择合适的rpm bundle版本进行下载
查询CPU的类别,主要是aarch要下载aarch的专用下载包
1
2
[root@vm-node1 ~]# cat /proc/cpuinfo | grep 'model name' |uniq
model name	: Intel(R) Core(TM) i9-10900 CPU @ 2.80GHz
下载
| Red Hat Enterprise Linux 7 / Oracle Linux 7 (x86, 64-bit), RPM Bundle | Jun 8, 2021 | 520.3M | |
|---|---|---|---|
| (mysql-5.7.35-1.el7.x86_64.rpm-bundle.tar) |
下载解压后如下图,是我们需要的
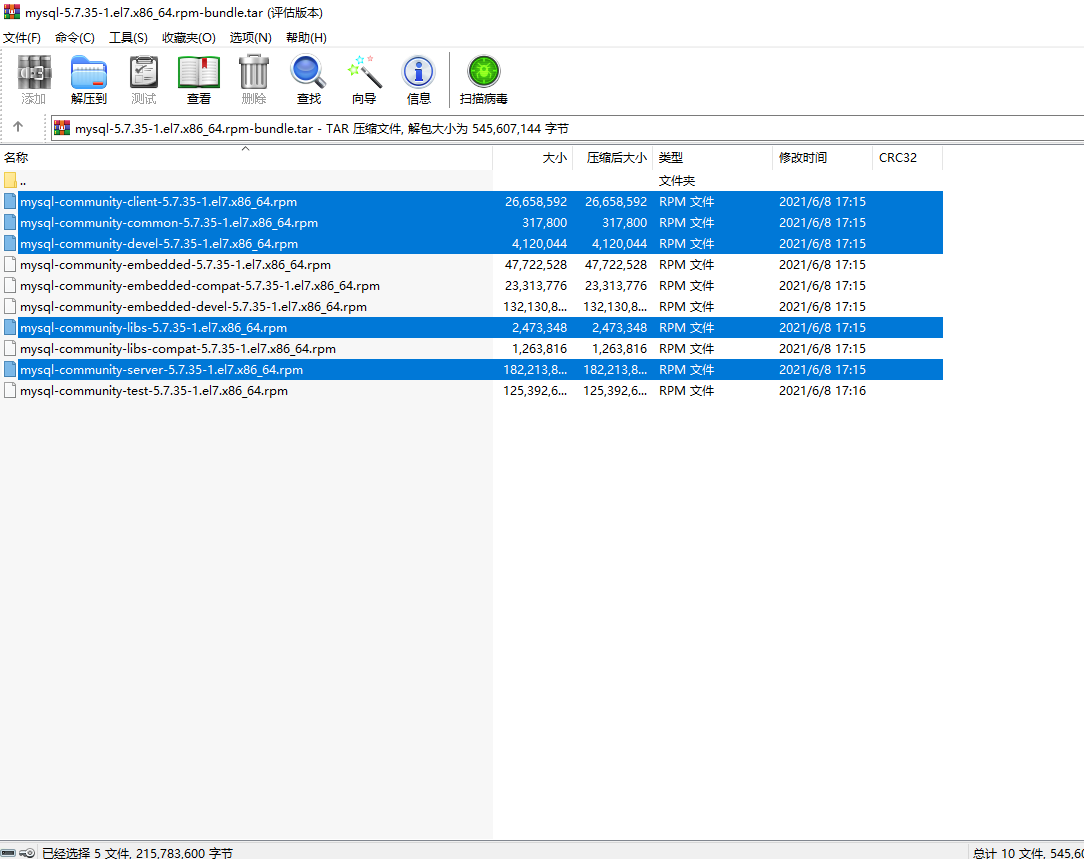
其中devel 包,正式环境可以不用安装 devel 包主要是供开发用,至少包括以下2个东西:
- 头文件
- 链接库 有的还含有开发文档或演示代码。
Mysql检测
安装之前,可先检测系统是否安装过mysql或者mariadb,如果有可以先卸载移除
1
2
3
4
5
6
[root@base home]# rpm -qa|grep mysql
[root@base home]# rpm -qa|grep mariadb
mariadb-libs-5.5.56-2.el7.x86_64

移除,找到检测冲突,进行移除
yum remove mariadb-libs-5.5.56-2.el7.x86_64
安装Mysql
按照如下顺序进行安装
1
2
3
4
5
6
rpm -ivhg mysql-community-common-5.7.35-1.el7.x86_64.rpm
rpm -ivhg mysql-community-libs-5.7.35-1.el7.x86_64.rpm
rpm -ivhg mysql-community-client-5.7.35-1.el7.x86_64.rpm
rpm -ivhg mysql-community-server-5.7.35-1.el7.x86_64.rpm

以上顺序有依赖关系,不要跨顺序安装
安装完成后启动mysql
1
[root@vm-node1 home]# systemctl start mysqld
如遇到错误,请查看错误排查
查看mysql的root的密码
1
2
3
[root@vm-node1 home]# grep 'temporary password' /var/log/mysqld.log
2021-12-18T03:31:30.464157Z 1 [Note] A temporary password is generated for root@localhost: VIqgJb2Rr<vu
2021-12-18T04:03:06.784139Z 1 [Note] A temporary password is generated for root@localhost: l=ufaG7-Bx&c
找到日志
A temporary password is generated for root@localhost: JcVg)y9e;tgq
可以得知密码是l=ufaG7-Bx&c
下一步就是修改密码啦
修改密码
使用刚刚的密码登录mysql
1
2
3
4
5
6
7
8
9
10
11
12
13
14
15
16
17
[root@vm-node1 home]# mysql -uroot -poKcftk:nl3x=
mysql: [Warning] Using a password on the command line interface can be insecure.
Welcome to the MySQL monitor.  Commands end with ; or \g.
Your MySQL connection id is 8
Server version: 8.0.26

Copyright (c) 2000, 2021, Oracle and/or its affiliates.

Oracle is a registered trademark of Oracle Corporation and/or its
affiliates. Other names may be trademarks of their respective
owners.

Type 'help;' or '\h' for help. Type '\c' to clear the current input statement.

mysql>alter user user() identified by "!QAZ2wsx";
Query OK, 0 rows affected (0.02 sec)
exit
第一次安装必须先修改密码
后面再次修改时,可以
1
2
3
4
5
6
7
mysql> use mysql;
Reading table information for completion of table and column names
You can turn off this feature to get a quicker startup with -A

Database changed
mysql> ALTER user 'root'@'localhost' IDENTIFIED BY 'Qaz.1234';
Query OK, 0 rows affected (0.00 sec)
Mysq授权远程访问
生产环境本步骤可以不做噢
授权命令如下
1
2
3
4
5
grant all privileges on *.* to 'username'@'%' identified by 'password' with grant option;

grant all privileges on *.* to 'root'@'%' identified by 'Qaz.1234' with grant option;
flush privileges;
quit;
如果授权了发现还是无法访问,一般是服务器防火墙开启导致的。
解决办法是,要么关闭防火墙,要么针对mysql端口进行授权
1
2
3
4
systemctl stop firewalld
或者
firewall-cmd --add-port=3306/tcp --permanent
firewall-cmd --reload
关于防火墙,请查看
Mysql配置文件优化配置
默认安装的mysql目录,配置的参数如下
1
2
3
4
5
6
[mysqld]
datadir=/var/lib/mysql
socket=/var/lib/mysql/mysql.sock

log-error=/var/log/mysqld.log
pid-file=/var/run/mysqld/mysqld.pid
一般情况下,我们需要增加后的配置如下
1
2
3
4
5
6
7
8
9
10
11
12
13
14
15
16
17
18
19
20
21
22
23
24
25
[mysqld]
port=3306
# 设置3306端口
datadir=/var/lib/mysql
socket=/var/lib/mysql/mysql.sock

log-error=/var/log/mysqld.log
pid-file=/var/run/mysqld/mysqld.pid

innodb_buffer_pool_size = 128M
# INNODB的一级缓存,默认是128M,在专用数据库服务器上,可以配置内存的80%。
lower_case_table_names = 1
# 是否支持数据库大小写敏感,默认为0,1表示不敏感,所以也是必须要配置
max_connections=1000
# 允许的最大连接数,默认为100,所以必须配置
# 实际起作用的最大值(实际最大可连接数)为16384,该参数在服务器资源够用的情况下应该尽量设置大,以满足多个客户端同时连接的需求。否则将会出现类似”Too many # connections”的错误。配置可以根据业务1000-10000。具体和业务规模,是否专用数据库服务器(CPU,内存)相关,查询密度。
# 该值配置大不会占用服务器系统资源。
max_connect_errors=100
# 允许连接失败的次数。这是为了防止有人从该主机试图攻击数据库系统
character-set-server=utf8mb4
# 服务端使用的字符集默认为UTF8
[client]
# 设置mysql客户端连接服务端时默认使用的端口
port=3306
default-character-set=utf8mb4
Mysql卸载
1
2
3
4
5
6
7
8
9
10
11
12
13
14
15
16
rpm -qa|grep mysql
rpm -ev XXX
如果提示依赖包错误,则使用以下命令尝试
rpm -ev XXX --nodeps
检测是否有遗留文件未删除
find / -name mysql
rm -rf /var/lib/mysql
rm -rf /usr/bin/mysql
rm -rf /usr/lib64/mysql
rm -rf /usr/share/mysql
rm -rf /etc/selinux/targeted/active/modules/100/mysql
rm -rf /etc/selinux/targeted/tmp/modules/100/mysql

rm -rf /etc/my.cnf
#这样会删除原有mysql的数据,如果需要备份,首先进行备份
常见错误
错误1:遗留文件删除
遗留的mysql文件导致安装失败
目录在/var/lib/mysql
删除ib_logfileXX
删除ibdata1
重启即可
错误2:权限问题
2021-12-18T03:26:04.917561Z 0 [ERROR] Failed to create file(file: ‘./auto.cnf’, errno 13) 2021-12-18T03:26:04.917562Z 0 [ERROR] Initialization of the server’s UUID failed because it could not be read from the auto.cnf file. If this is a new server, the initialization failed because it was not possible to generate a new UUID.